DiffableDataSource là một API mới của UITableView và UICollectionView được giới thiệu tại WWDC19 trên IOS 13 để thay thế cho UITableViewDataSource và UICollectionViewDataSource.
Trong bài viết này, chúng ta sẽ tìm hiểu sơ lược về UITableViewDataSource, sau đó c sẽ đi thẳng đến API mới và xem nó hoạt động như thế nào với một ví dụ.
UITableViewDataSource
Trước đây, khi làm việc với UITableView hoặc UICollectionView, bạn cần phải implement protocol UITableViewDataSource để chỉ định chi tiết những dữ liệu được hiển thị trên cell hay các supplementary views như headers and footers.
1 | // Providing number of Rows and Sections |
bất cứ khi nào dữ liệu ở controller thay đổi, thông thường chúng ta phải reload toàn bộ các thành phần của tableView bằng cách gọi reloadData() hoặc performBatchUpdates(_:completion:)... để cập nhật (insert, delete, move) các item hay section cụ thể, tương tự như sau:
1 | self.tableView.performBatchUpdates({ |
Nhưng bạn cần phải cẩn thận khi thực hiện các thay đổi và đảm bảo các thay đổi được áp dụng theo đúng thứ tự.
Nếu không, khi cập nhật sẽ bị lỗi, bạn sẽ nhận được một cái gì đó như:
Mặc dù cách tiếp cận UITableViewDataSource đơn giản và linh hoạt nhưng nó cũng dễ xảy ra lỗi và là nguồn phát sinh crash phổ biến khi có sự sai lệch giữa trạng thái UI hiện tại với data do controller quản lý.
Diffable data source
Giờ đây với UITableViewDiffableDataSource, bạn có thể tạo dataSource và apply các thay đổi giữa các state một cách an toàn hơn bằng cách thao tác với snapshot (một khái niệm mới đại diện cho trạng thái hiện tại của tableView).
Để hiển thị hoặc cập nhật dữ liệu, bạn chỉ cần tạo một đối tượng của NSDiffableDataSourceSnapshot với dữ liệu đã được cập nhật và cung cấp nó cho dataSource thông qua việc gọi phương thức apply (_: animatingDifferences :), nó sẽ so sánh sanpshot hiện tại ( rendered models ) với snapshot mới để xem sự khác biệt sau đó hiển thị lên tableView.
Getting Started
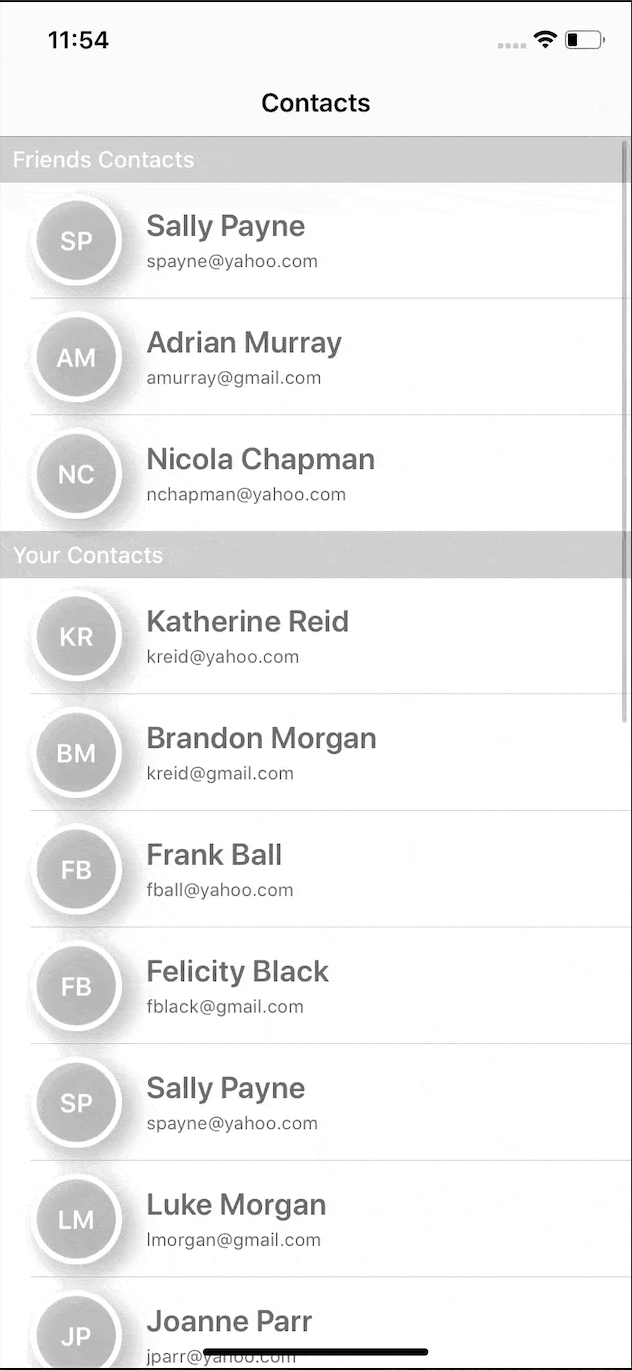
Bây giờ chúng ta hãy xem một ví dụ về màn hình hiển các contact list với thanh tìm kiếm cho phép người dùng tìm kiếm danh bạ của mình theo tên.
Như đã đề cập, với cách tiếp cận mới, chúng tôi chỉ cần hai loại
UITableViewDiffableDataSourcecó hai kiểu chung: Kiểu item và kiểu section, để chỉ định tableView cách hiện thị cell và các supplementary views.NSDiffableDataSourceSnapshot <SectionIdentifierType, ItemIdentifierType>: đại diện cho dataSource mới sẽ được hiển thị.
Create the model
Bắt đầu bằng cách tạo 1 model Contact, nó là dữ liệu sẽ được hiển thị trong TableView.
1 | struct Contact : Hashable { |
Note: Diffable data source yêu cầu SectionIdentifierType và ItemIdentifierType (model) phải kế thừa Hashable để cho phép dataSource so sánh giữa các snapshot với nhau để tìm ra sự khac biệt (để biết chính xác những gì đã được chèn, xóa hoặc di chuyển).
Setting up the data source
Đầu tiên, tạo 1 Section type chúng sẽ được sử dụng dưới dạng SectionIdentifierType, gồm 2 section:
1 | enum Section : Int , CaseIterable { |
Sau đó, tạo và tuỳ chỉnh diffable data source để cung cấp cho TableView với chi tiết về cách hiện thị cells va các supplementary view ( section headers and footers )
1 | typealias DataSource = UITableViewDiffableDataSource<Section, Contact> |
Note: bạn thường làm các việc trên bằng cách triển khai cellForRowAt, titleForHeaderInSection, v.v. với UITableViewDataSource
Creating a Snapshot
Bây giờ TableView đã biết chính xác cách hiển thị dữ liệu, chúng ta cần cung cấp cho TableView dữ liệu để hiển thị. Đây là lúc NSDiffableDataSourceSnapshot xuất hiện.1
2
3
4
5
6
7
8
9
10
11
12
13
14
15
16
17private var friendsContacts : [Contact] = Contact.friendsContacts
private var allContacts : [Contact] = Contact.allContacts
typealias Snapshot = NSDiffableDataSourceSnapshot<Section, Contact>
override func viewDidLoad(){
super.viewDidLoad()
// some other UI Configurations
applySnapshot(animatingDifferences: false)
}
func applySnapshot(animatingDifferences: Bool = true) {
var snapshot = Snapshot()
snapshot.appendSections( Section.allCases )
snapshot.appendItems(friendsContacts, toSection: .friendsContacts)
snapshot.appendItems(allContacts, toSection: .allContacts)
dataSource.apply(snapshot, animatingDifferences: animatingDifferences)
}
Tạo một snapshot với các section và item sẽ được hiển thị. Bất cứ khi nào apply một snapshot mới, TableView sẽ so sánh với snapshot hiện tại để biết chính xác những gì được cập nhật, sau đó hiển thị và tạo các animation cho các cập nhật đó.
Add UISearchController
1 | private var friendsContacts : [Contact] = Contact.friendsContacts |
Bất cứ khi nào người dùng thay đổi text trong searchBar, chúng ta sẽ cập nhật danh sách allContacts và friendsContacts cho phù hợp sau đó apply một snapshot mới, và các danh sách cập nhật sẽ được hiển thị.
Supplementary Views
Cuối cùng hãy header cho cả hai section.1
2
3class SectionHeaderReusableView: UITableViewHeaderFooterView {
// whatever how it looks
}
Sau đó implement các method cần thiết của UITableViewDelegate như sau:1
2
3
4
5
6
7
8
9
10
11
12
13
14
15
16
17
18
19
20
21
22
23
24
25
26
27
28
29
30
31
32
33// MARK: - UITableViewDelegate
extension ContactsTableViewController {
override func tableView(_ tableView: UITableView, heightForHeaderInSection section: Int) -> CGFloat {
return 30
}
override func tableView(_ tableView: UITableView, heightForFooterInSection section: Int) -> CGFloat {
return CGFloat.leastNormalMagnitude
}
override func tableView(_ tableView: UITableView, viewForHeaderInSection section: Int) -> UIView? {
guard let header = tableView.dequeueReusableHeaderFooterView(
withIdentifier: SectionHeaderReusableView.reuseIdentifier) as? SectionHeaderReusableView
else {
return nil
}
if section == Section.allContacts.rawValue {
header.titleLabel.text = "Your Contacts"
} else {
header.titleLabel.text = "Friends Contacts"
}
return header
}
override func tableView(_ tableView: UITableView, viewForFooterInSection section: Int) -> UIView? {
return nil
}
}
Final